The GitHub Branch Source plugin allows you to create a new project based on the repository structure from one or more GitHub users or organizations. You can either:
-
Use a Multibranch Pipeline to import a single repository’s branches, pull requests, and tags as Pipeline projects.
-
Use an Organization Folder project to import all or a subset of repositories belonging to a GitHub user or organization as "Multibranch Pipeline" projects.
Multibranch Pipeline projects for a repository
The Multibranch Pipeline project scans a repository, creating the Pipeline projects for branches, pull requests, and/or tags, depending on the criteria you specify.
To define a project you create a Pipeline script in a Jenkinsfile in the root directory of a branch in the project.
It is not necessary to use exactly the same Pipeline script in each branch. Instead, you can have different Pipeline scripts defined in different branches, or add and remove Jenkinsfiles depending on your use cases.
After the project is created, Jenkins immediately runs that project.
Removing a Pipeline script from a branch removes the associated projects from the Multibranch Pipeline.
You can restrict the branches that are examined by using a regular expression on the GitHub Multibranch Pipeline configuration page.
This plugin fits into the larger "Pipeline as Code" story; for more information, refer to Understand and implement Pipeline as Code.
Work with GitHub pull requests
Multibranch pipeline projects have a wide range of other options for controlling which Pipeline projects are created and when they are run. For example, you can choose to build origin-repository pull requests in addition to, or instead of, building the plain branches; and you can choose to build pull requests without merging with the base branch, or in addition to building the merge product. The following features are included:
-
The GitHub user or organization repository’s pull requests are treated as projects.
-
The pull request and branch build result status is reported back to GitHub.
When the proper webhooks are configured, Jenkins reports the status of the pull request’s projects to GitHub. The status is reported as follows:
-
Success - the job was successful
-
Failure - the job failed and the pull request is not ready to be merged
-
Error - something unexpected happened; example: the job was aborted in Jenkins
-
Pending - the job is waiting in the build queue
Example Multibranch Pipeline project
This example uses the following environment to create a Multibranch Pipeline.
-
Jenkins controller 2.516.1
-
An agent connected to that controller (labeled "Linux").
-
Tunnel set up via ngrok to send webhooks from GitHub to the Jenkins controller.
-
A repository for the application to get data for the Multibranch project. This example uses the
Multibranch-sample-apprepository.
To create a Multibranch Pipeline complete the following steps.
-
Ensure that you have authenticated credentials for your repository. This example uses the GitHub app for authentication. For step-by-step instructions on creating a GitHub application, refer to Use GitHub App authentication. For instructions on adding the credentials to your repository, refer to Using GitHub App authentication - Adding the Jenkins credential.
-
Go to the Jenkins dashboard, and then select New Item.
-
In the Enter an item name field, type in the name for the Multibranch Pipeline project that you want to create. For this example let us name the project
sample-multibranch.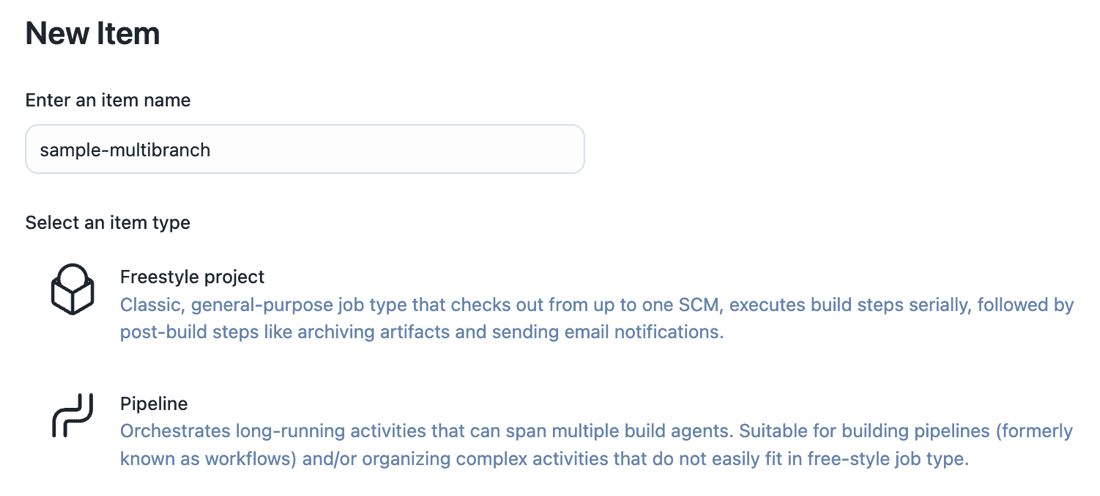
-
Scroll down and select Multibranch Pipeline.
-
Select OK. The General settings page is displayed.
-
Scroll down to Branch Sources. Select the Add source dropdown, and then select GitHub.
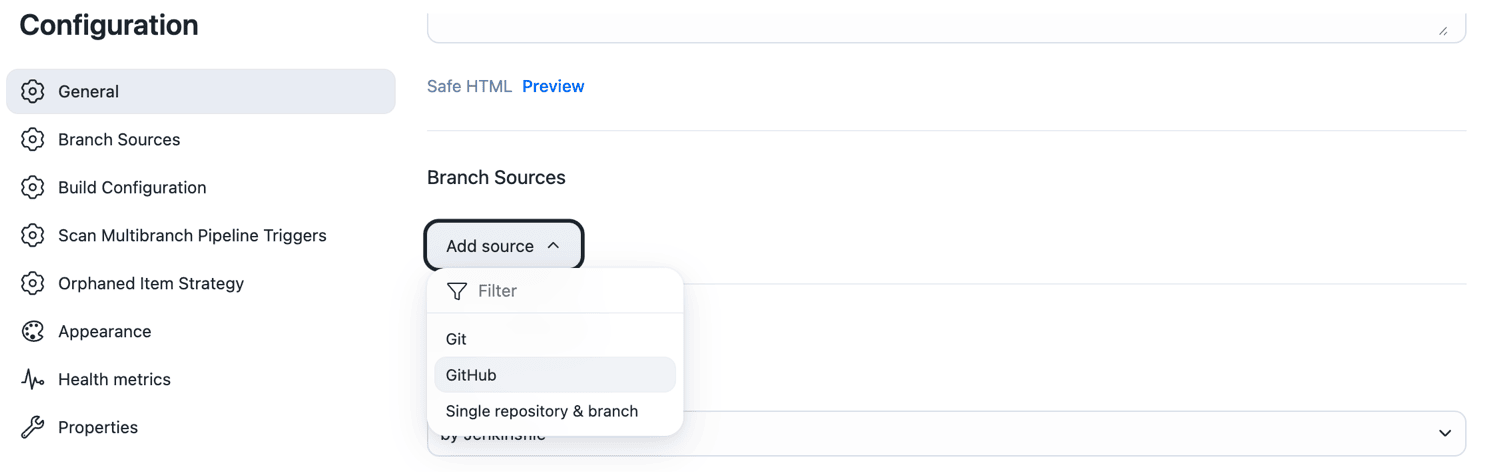
-
Select the credentials for your repository from the Credentials dropdown. These are the credentials you created for the GitHub app.
-
Provide the URL for the repository. This example uses the
multibranch-sample-apprepository. Your URL should look something like thishttps://github.com/your-organization/multibranch-sample-app.git. -
Select Save.
Ensure that you have a Jenkinsfile in the root of your repository as the build is configured to look for a Jenkinsfile in the root of a branch.
| If you now create a new branch in your repository, that branch is automatically added to the project that you created. A PR associated with this project is also created automatically. |
Create an Organization Folder project
This plugin creates a new project type, the Organization Folder. The Organization Folder project creates a Multibranch Pipeline for each repository in an organization. This Multibranch Pipeline then creates a separate project for each branch that contains a Jenkinsfile in the top level directory.
To use this plugin, you must have GitHub credentials with the appropriate access level to your project (refer to the section on credentials below) installed in Jenkins.
Set up your Organization Folder as follows:
-
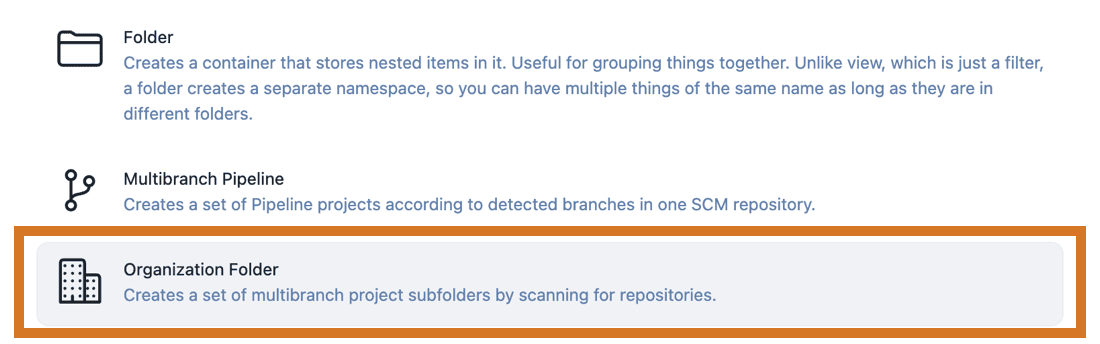
From the Jenkins dashboard select New Item > Organization Folder. Enter an item name and select OK.
-
On the Projects tab, enter the details for Organization Folder.
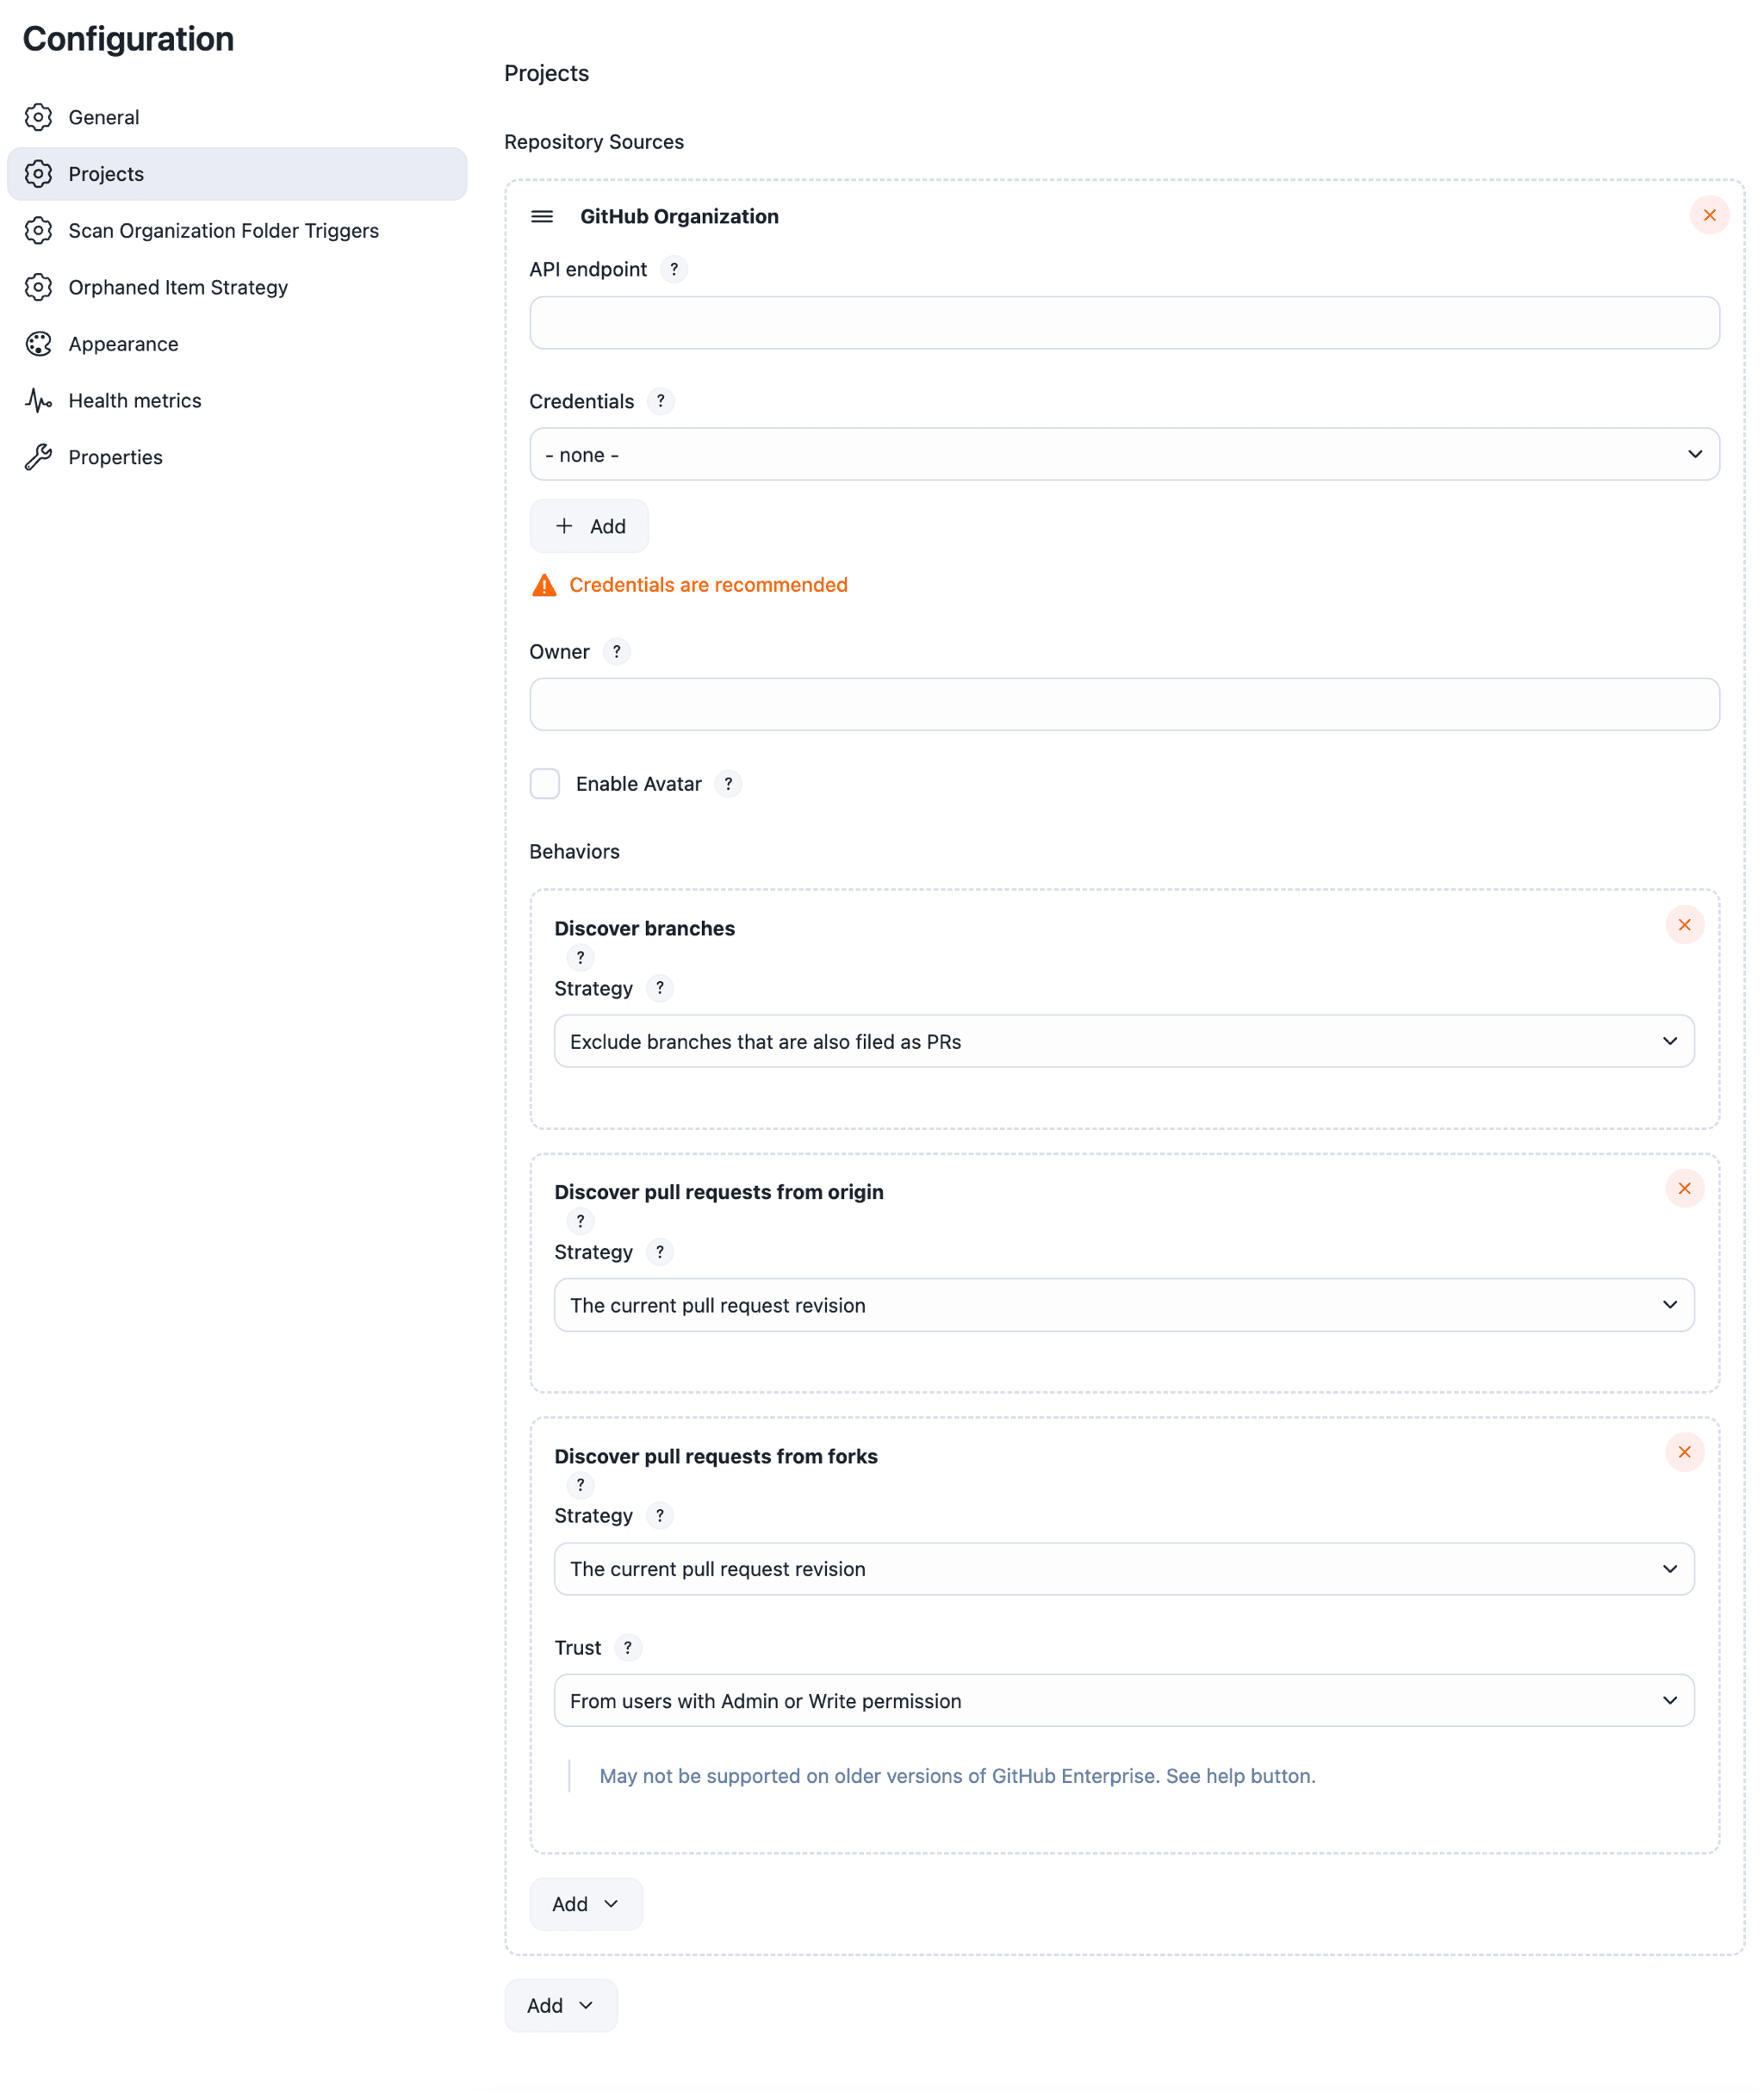
-
Select or add new Credentials.
These credentials must have sufficient permissions to at least access the repositories and their contents for the intended user or organization. -
In the Owner field, specify a username or an organization name.
-
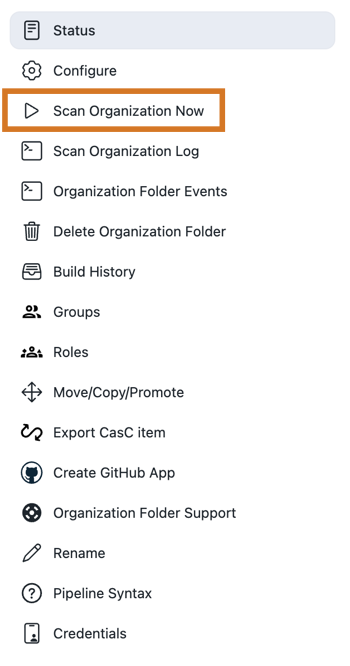
Save, and wait for the Scan Organization to run. The project’s progress is displayed on the left-hand side.
-
You may need to refresh the page after it runs to access your repositories. Each of the repositories that you have imported is represented by a Multibranch Pipeline project. The configuration of these projects is controlled by the parent Organization Folder project. The imported repository is represented as a folder containing a project for each branch with a Pipeline script defined in a
Jenkinsfilein the root directory. You cannot modify the settings on these folders.
Select Organization Folder project credentials
There are two different types of credentials for the Organization Folder:
-
scan credentials: used to access the GitHub API
-
checkout credentials: used to clone the repository from GitHub
You can use different credentials for each as long as they have the appropriate permissions. There is an anonymous option for checkout. Regardless, you should create a GitHub access token to use to avoid storing your password in Jenkins and prevent any issues when using the GitHub API. When using a GitHub access token, you must use standard Username with password credentials, where the username is the same as your GitHub username and the password is your access token.
Manage your GitHub Connections
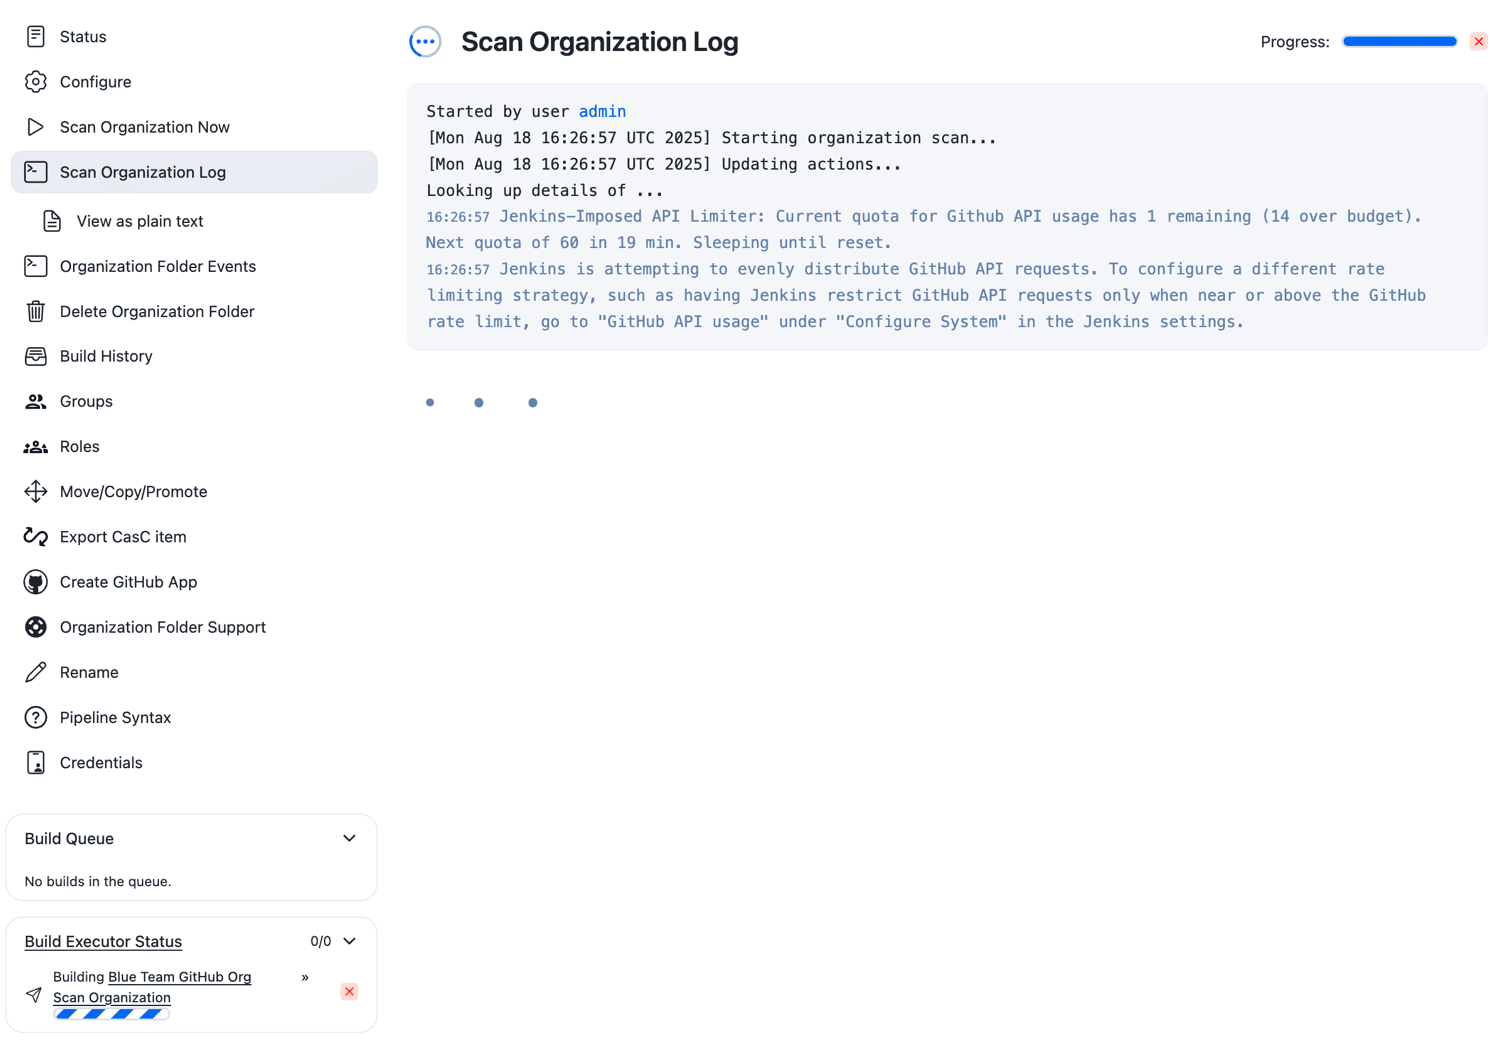
GitHub rate limiting
GitHub limits the number of API calls that an account can make within a particular time frame, also known as the "rate limit". The GitHub Branch Source plugin tracks the rate limit and lets administrators specify a strategy for apportioning their API call budget.
To configure a different rate limit strategy (for example, to have Jenkins attempt to evenly distribute GitHub API requests):
-
Select in the upper-right corner to navigate to the Manage Jenkins page.
-
Select System. From the System screen, two settings related to GitHub API requests can be configured:
-
Normalize API requests: Attempt to evenly distribute GitHub API requests. This strategy can be helpful when several pipelines are managed by multiple users or if there are several concurrent builds, making it difficult to know when a pipeline has been paused because it exceeded the default GitHub API usage limit.
-
Throttle at/near rate limit: Restrict GitHub API requests only when near or above the rate limit. This strategy may be preferred over "Throttle for Normalize" if there are relatively few/infrequent queries to the GitHub API.
-
Use build triggers and webhooks
You can change the build configuration to perform the Scan Organization at different times. The default setting scans your GitHub repository for changes if it has not received any change notifications from GitHub within the past day. This scan will catch the repositories you’ve added or removed from the managed GitHub repository. You can always force the Scan Organization Now to run from the Organization Folder page.
While the build triggers are often enough, you can set up webhooks to automatically trigger builds when changes are pushed to your GitHub repositories.
| To do this you must have a GitHub login with a token. |
-
Select in the upper-right corner to navigate to the Manage Jenkins page.
-
Select System.
-
In the GitHub section, add a GitHub Server with your credentials.
-
If you need a token, generate one by selecting the Advanced button next to the notebook and pencil, then selecting the Manage additional GitHub actions button next to Additional actions and select Convert login and password to token.
You can also configure this manually through GitHub by registering the URL provided in the help section of the server config.