CloudBees CI Slack Integration sends Slack messages directly to you to notify you of relevant status information and build data at the end of the sequence, so that you know if the build was successful, and if not, the actions that need to be taken to get a failed build back on track. The notifications include information on build and test results, including direct links to results and error details.
Sending messages directly to Slack means that you do not need to switch between different tools to be alerted when builds complete, and in the case of failed builds you can take immediate action.
CloudBees CI Slack Integration feature benefits
The CloudBees CI Slack Integration feature provides the following benefits:
-
Provides feedback immediately upon completion of a build.
-
Highlights the causes of build failures quickly.
-
Limits context switching between tools.
-
Installs easily and does not require updates to Pipelines.
| This feature does not require any modifications to Pipelines. |
| CloudBees CI Slack Integration messages are only sent for commits that have a name associated with them. For example, for GitHub, Slack Integration messages are only sent for Pull Requests - you will not get a failure notification on a branch. |
The process of setting up actionable build notifications in Slack requires an Administrator to complete the following steps from Slack’s App API:
And the following steps from the CloudBees CI controller:
Supported versions
The CloudBees Slack Integration plugin is available on the following versions and platforms:
-
CloudBees CI on modern cloud platforms version 2.222.4.3 (and higher)
-
CloudBees CI on traditional platforms version 2.222.4.3 (and higher)
Create a new Slack App
The Slack App that Administrators create is a hub for messages that will be used by the CloudBees Slack Integration Plugin to notify users of information regarding builds: failures, JUnit errors, Pipeline Policy violations, or even when the build completes successfully.
| The following set of instructions includes a reference implementation of the Slack API. Your experience with the Slack API may vary depending on the version you are currently using. For more information from Slack API documentation, see an introduction to Slack apps. |
-
Navigate to Slack’s App API in a browser.
-
Select Your Apps in the top right corner.
-
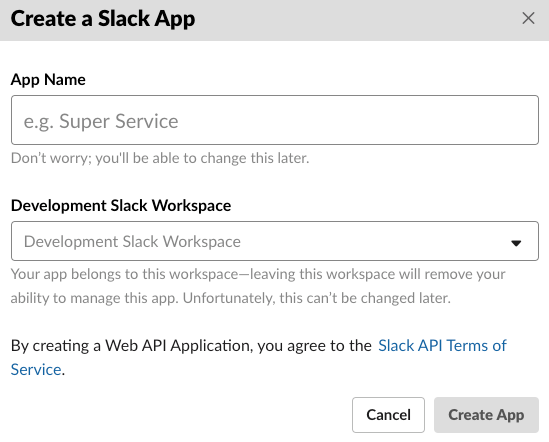
Select either Create an App if you have never created a Slack App before
or
Create New App if you have previously created a Slack App.
-
Enter an App Name.
-
Select a Development Slack Workspace from the drop-down menu.
-
Select Create App.
-
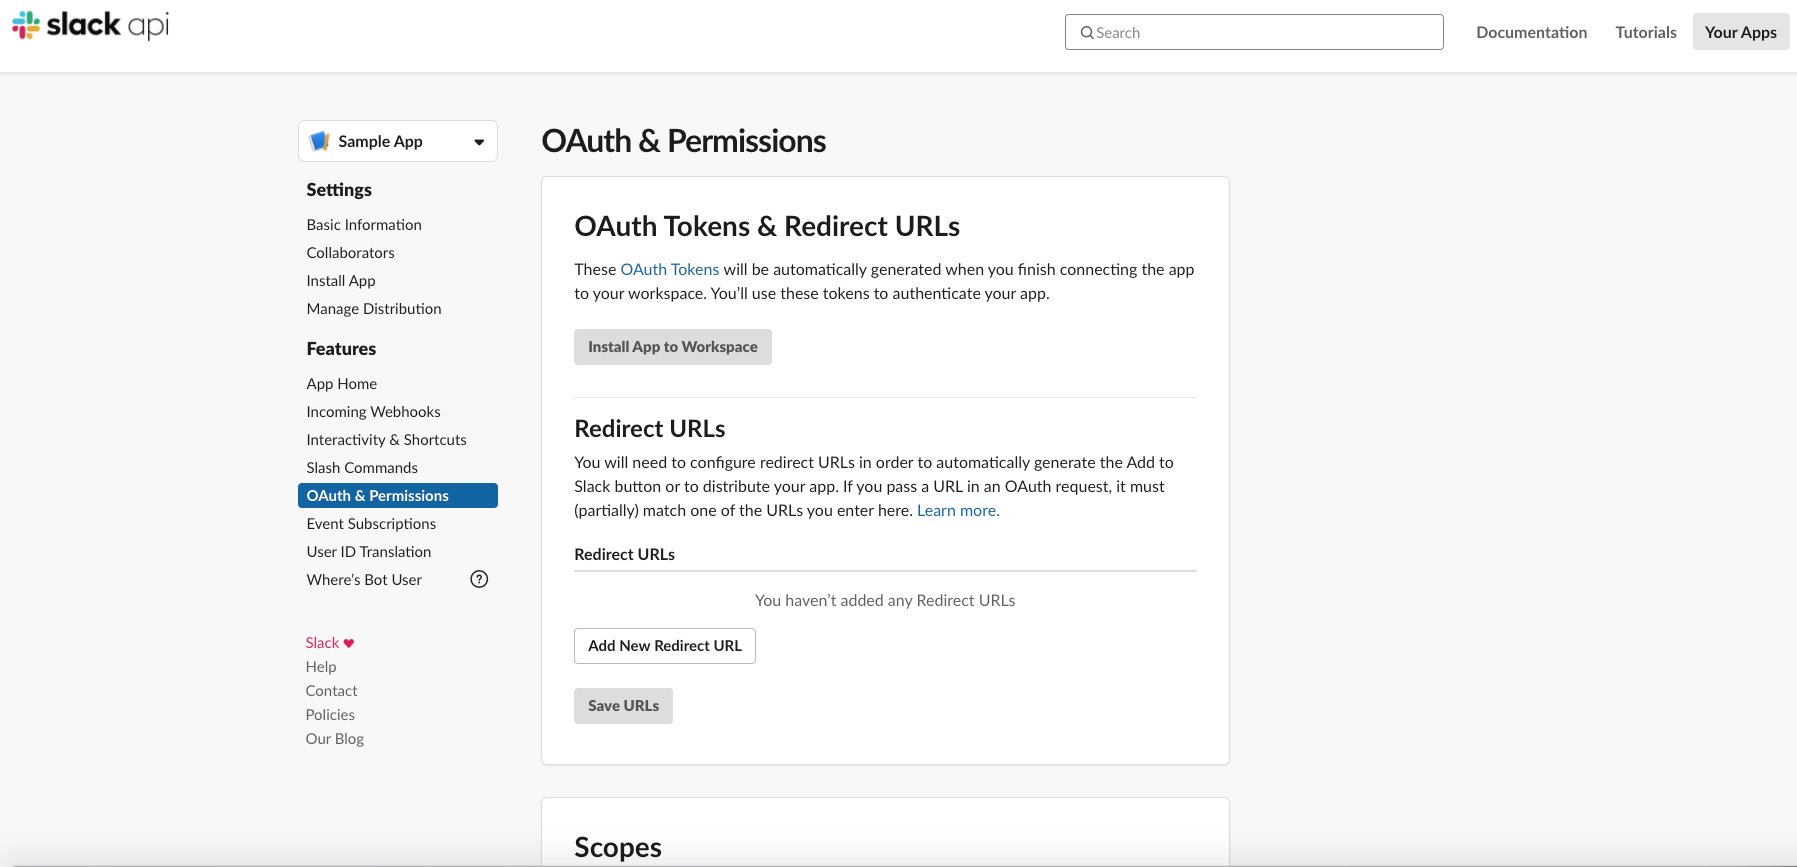
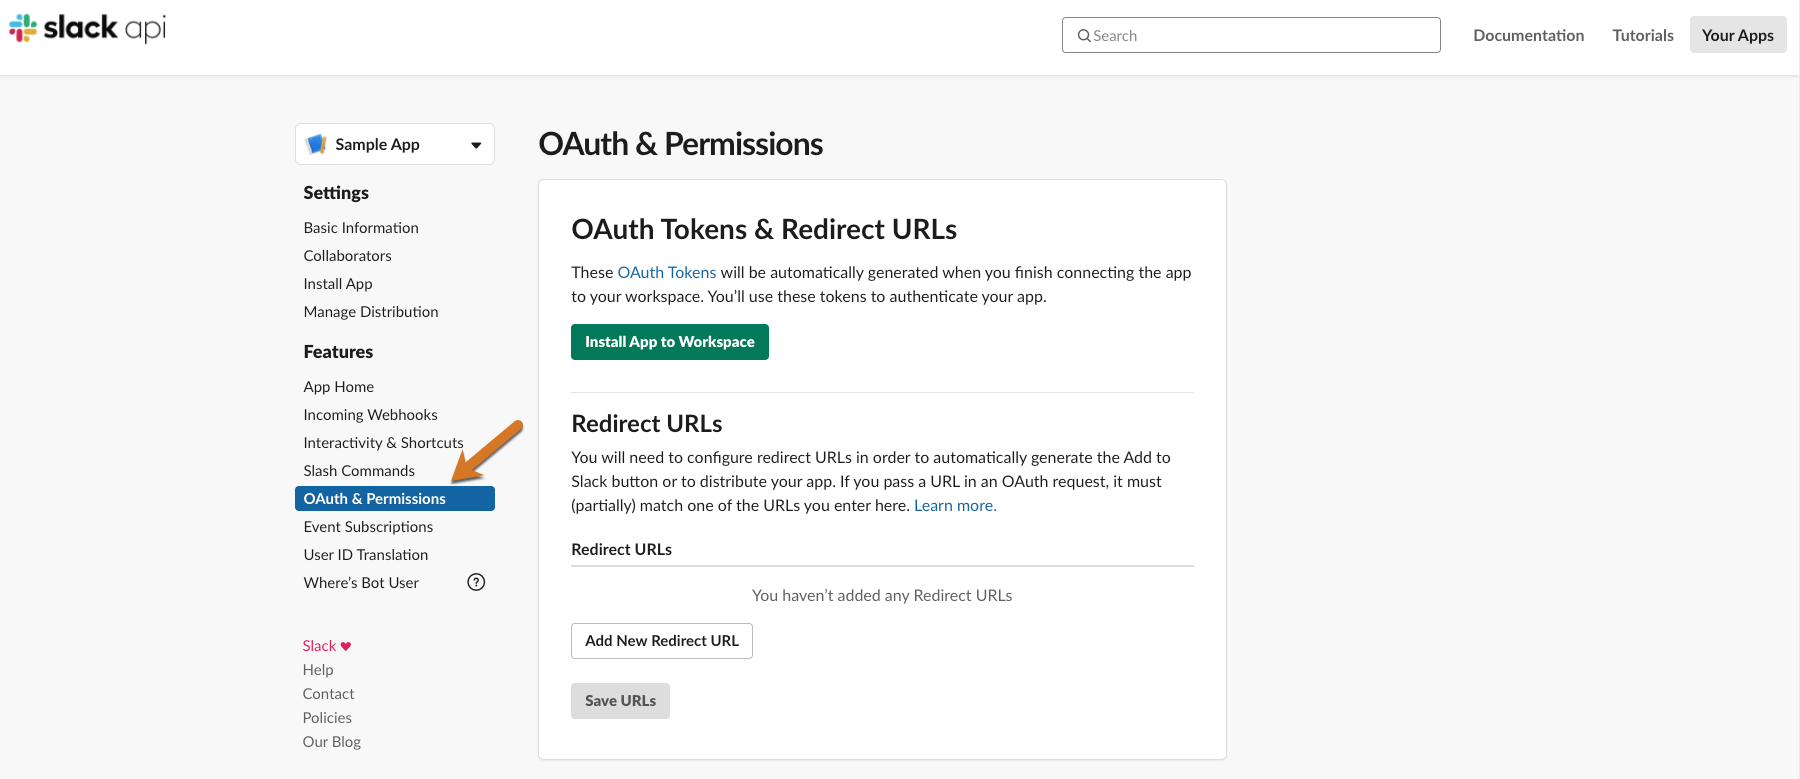
Select OAuth & Permissions in the left pane.
-
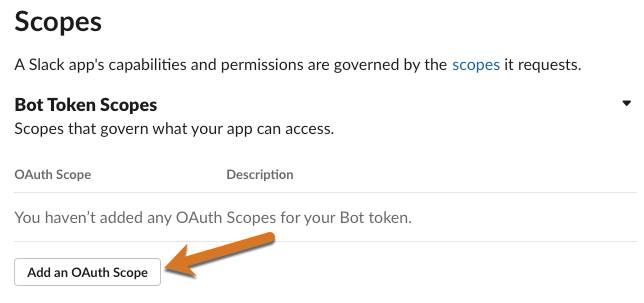
Scroll down to Scopes.
-
Select Add an OAuth Scope under Bot Token Scopes.
-
Select and add the following scopes:
Table 1. Scopes Scope Description chat:write
Send messages as <App Name>
chat:write.customize
Send messages as <App Name> with a customized username and avatar
chat:write.public
Send messages to channels <App Name> isn’t a member of
files:read
View files shared in channels and conversations that <App Name> has been added to
files:write
Upload, edit, and delete files as <App Name>
links:read
View some URLs in messages
links:write
Show previews of URLs in messages
users:read
View people in the workspace
users:read.email
View email addresses of people in the workspace
You must include all the scopes listed, or the Slack App will not function properly. For example, without users:readandusers:read.email, the plugin won’t be able to retrieve users.
Install the new Slack App in a client workspace
| Admin privileges are required in the Slack workspace to install the new Slack App. |
| The following set of instructions includes a reference implementation of the Slack API. Your experience with the Slack API may vary depending on the version you are currently using. For more information from Slack API documentation, see an introduction to Slack apps. |
-
Sign in to your desired workspace.
-
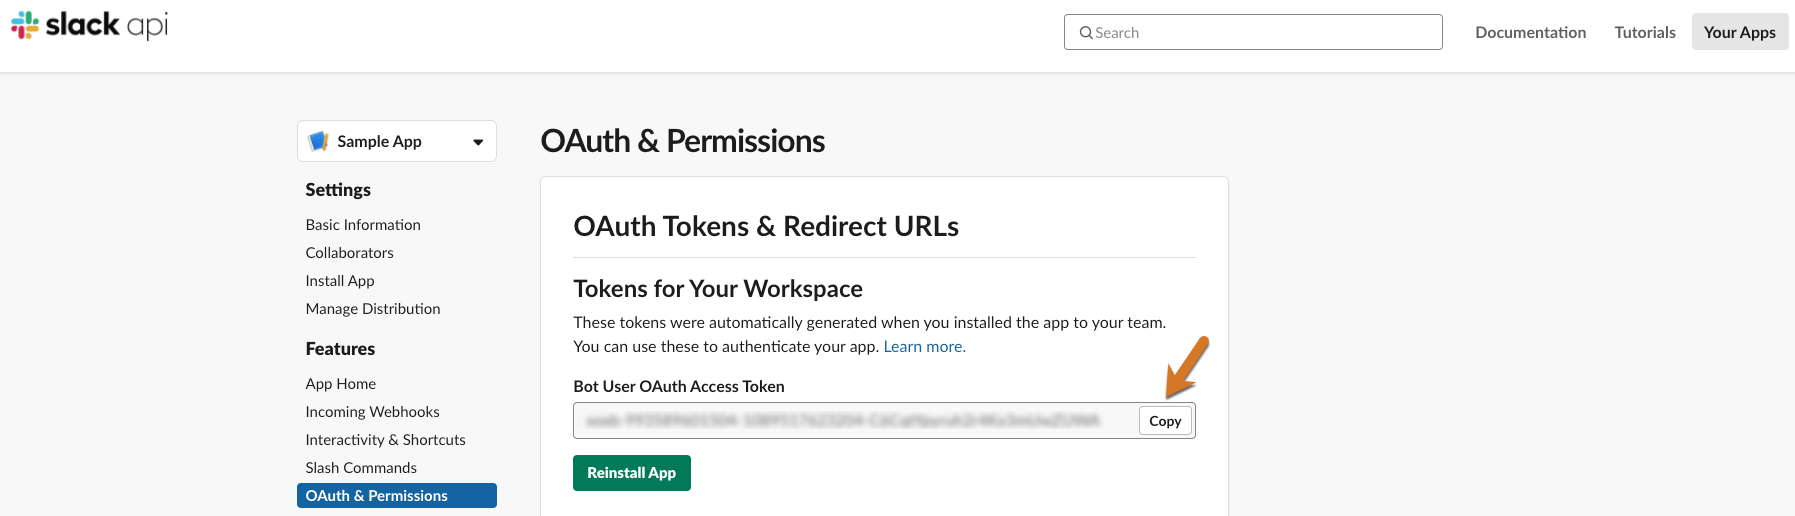
Select OAuth & Permissions in the left pane.
-
Under OAuth Tokens & Redirect URLs select Install App to Workspace.
-
Select Allow.
-
Select Copy to copy the Bot User OAuth Access Token.
Install the CloudBees Slack Integration Plugin
To install the CloudBees Slack Integration Plugin from your CloudBees CI controller:
-
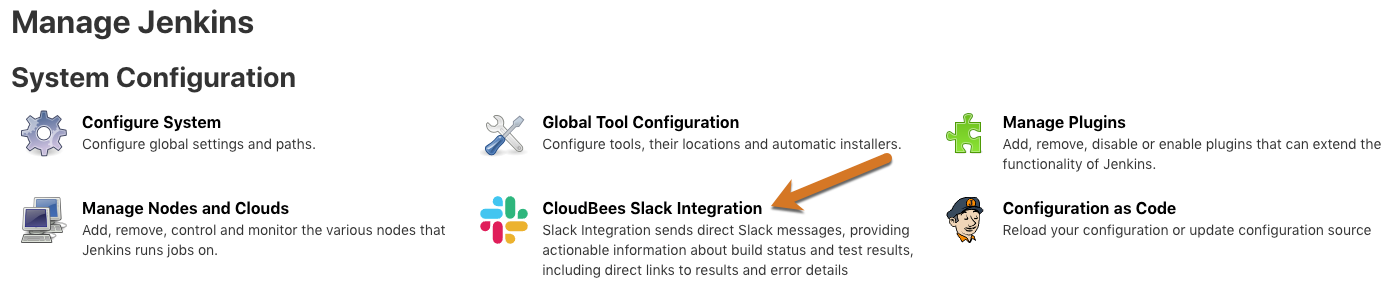
Select in the upper-right corner to navigate to the Manage Jenkins page.
-
Select Plugins, and then select Available plugins.
-
Use the Filter field to search for
CloudBees Slack Integration Plugin. -
Select the checkbox to choose the CloudBees Slack Integration Plugin.
-
Select Download now and install after restart to install the plugin.
-
Restart CloudBees CI.
Add the Slack Bot Token as secret text
Adding the Slack Bot token as a secret will allow it to be stored securely within the CloudBees CI controller.
-
Select in the upper-right corner to navigate to the Manage Jenkins page.
-
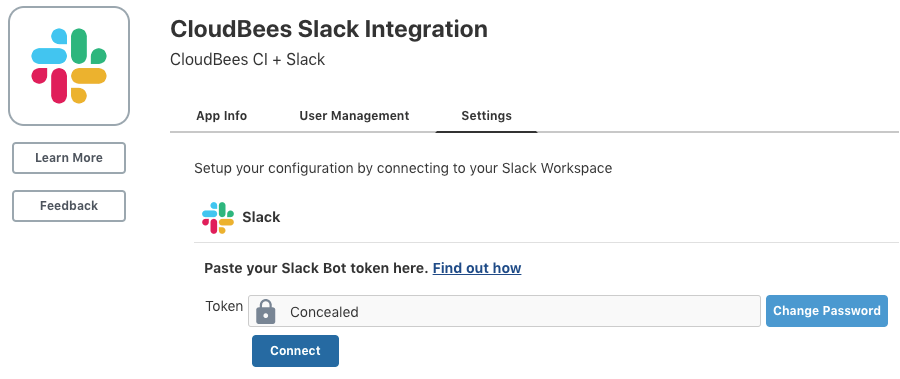
Select CloudBees Slack Integration.
-
Select Settings.
-
Under Slack, to the right of Token, paste the token you copied when Install the new Slack App in a client workspace.
-
Select Save.
Get the most out of notifications with recommended plugins
The CloudBees Slack Integration Plugin is greatly enhanced when it can gather information from other plugins including:
-
Code Coverage API plugin for code coverage reporting
-
Warnings Next Generation plugin (including SpotBugs warnings among others)
To receive an analysis with warnings in the Slack message, you need to include a quality gate. Refer to Quality gate configuration in the Warnings Next Generation plugin documentation.
After you have set up CloudBees CI Slack Integration in the Slack App API and CloudBees CI, you need to configure users so that they can start receiving messages.