Jenkins Pipeline includes built-in documentation and the Snippet Generator, which are key resources when developing Pipelines. They provide detailed help and information that is customized to the currently installed version of Jenkins and related plugins.
Additional tools include the command-line Pipeline linter and the "Replay" feature.
Find built-in documentation
Pipeline ships with built-in documentation features to make it easier to create Pipelines of varying complexities. This built-in documentation is automatically generated and updated based on the plugins installed in the Jenkins instance.
The built-in documentation can be found globally at:
http://localhost:8080/pipeline-syntax,
assuming you have a Jenkins instance running on localhost port 8080. The same
documentation is also linked as Pipeline Syntax in the sidebar for any
configured Pipeline project.
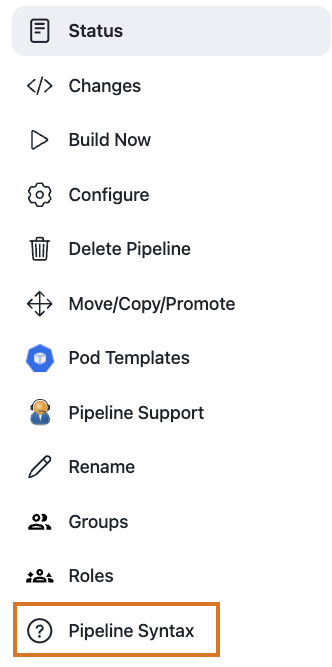
Use the Snippet Generator
The built-in "Snippet Generator" utility is helpful for creating bits of code for individual steps, discovering new steps provided by plugins, or experimenting with different parameters for a particular step.
The Snippet Generator is dynamically populated with a list of the steps available to the Jenkins instance. The number of steps available is dependent on the plugins installed which explicitly expose steps for use in Pipeline.
To generate a step snippet with the Snippet Generator:
-
Navigate to the Pipeline Syntax link (referenced above) from a configured Pipeline, or at
http://localhost:8080/pipeline-syntax. -
Select the desired step in the Sample Step dropdown menu
-
Use the dynamically populated area below the Sample Step dropdown to configure the selected step.
-
Select Generate Pipeline Script to create a snippet of Pipeline which can be copied and pasted into a Pipeline.
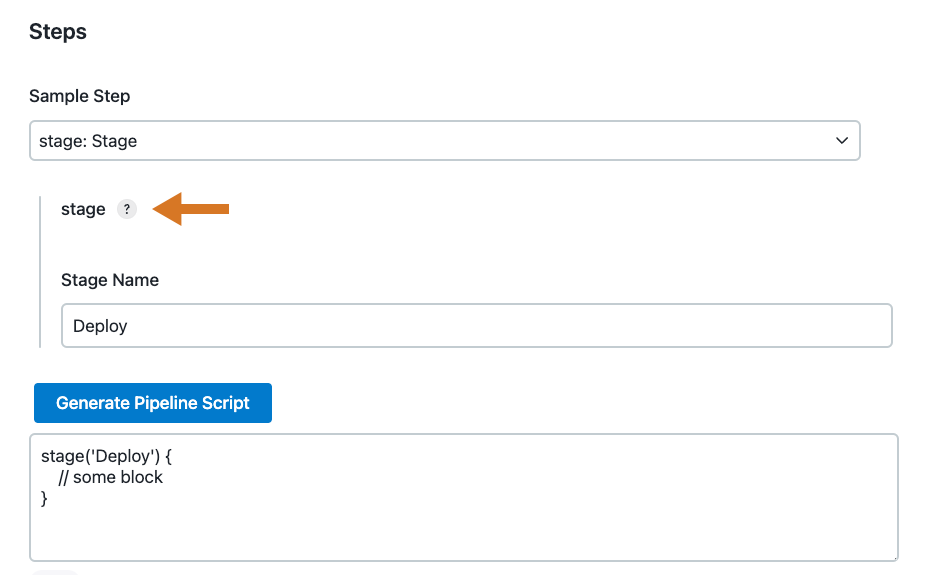
To access additional information and/or documentation about the step selected, select the help icon (indicated by the arrow in the image above).
Command-line Pipeline Linter
Jenkins can validate, or "lint", a Declarative Pipeline from the command line before actually running it. This can be done using a Jenkins CLI command or by making an HTTP POST request with appropriate parameters. We recommended using the SSH interface for running the linter. Refer to the Jenkins CLI documentation for details on how to properly configure Jenkins for secure command-line access.
# ssh (Jenkins CLI) # JENKINS_SSHD_PORT=[sshd port on controller] # JENKINS_HOSTNAME=[Jenkins controller hostname] ssh -p $JENKINS_SSHD_PORT $JENKINS_HOSTNAME declarative-linter < Jenkinsfile
curl# curl (REST API) # Assuming "anonymous read access" has been enabled on your Jenkins instance. # JENKINS_URL=[root URL of Jenkins controller] # JENKINS_CRUMB is needed if your Jenkins controller has CRSF protection enabled as it should JENKINS_CRUMB=`curl "$JENKINS_URL/crumbIssuer/api/xml?xpath=concat(//crumbRequestField,\":\",//crumb)"` curl -X POST -H $JENKINS_CRUMB -F "jenkinsfile=<Jenkinsfile" $JENKINS_URL/pipeline-model-converter/validate
Examples
Below are two examples of the Pipeline Linter in action.
This first example shows the output of the linter when it is passed
an invalid Jenkinsfile, one that is missing part of the agent declaration.
pipeline { agent stages { stage ('Initialize') { steps { echo 'Placeholder.' } } } }
Jenkinsfile# pass a Jenkinsfile that does not contain an "agent" section ssh -p 8675 localhost declarative-linter < ./Jenkinsfile Errors encountered validating Jenkinsfile: WorkflowScript: 2: Not a valid section definition: "agent". Some extra configuration is required. @ line 2, column 3. agent ^ WorkflowScript: 1: Missing required section "agent" @ line 1, column 1. pipeline } ^
In this second example, the Jenkinsfile has been updated to include the
missing any on agent. The linter now reports that the Pipeline is valid.
Jenkinsfilepipeline { agent any stages { stage ('Initialize') { steps { echo 'Placeholder.' } } } }
Jenkinsfilessh -p 8675 localhost declarative-linter < ./Jenkinsfile Jenkinsfile successfully validated.
"Replay" Pipeline runs with modifications
Typically, a Pipeline will be defined inside the classic Jenkins web UI,
or by committing to a Jenkinsfile in source control. Unfortunately,
neither approach is ideal for rapid iteration, or prototyping, of a Pipeline.
The "Replay" feature allows for quick modifications and execution of an existing
Pipeline without changing the Pipeline configuration or creating a new commit.
Usage
To use the "Replay" feature:
-
Select a previously completed run in the build history.
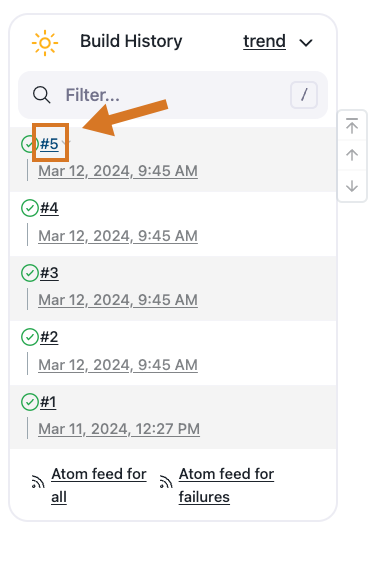 Figure 3. Previous Pipeline run
 -
Select Replay in the left menu.
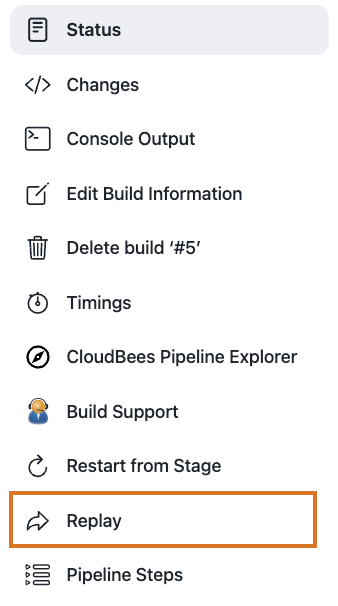 Figure 4. Replay
 -
Make modifications and select Run. In this example, we changed
ruby-2.3toruby-2.4.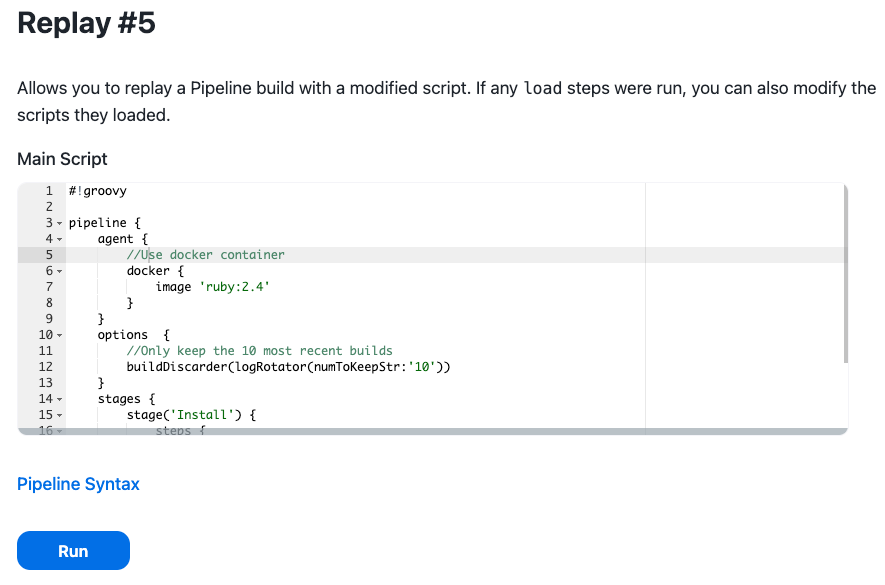 Figure 5. Run the Pipeline
 -
Check the results of changes
Once you are satisfied with the changes,
you can use Replay to view them again, copy them back to your Pipeline job
or Jenkinsfile, and then commit them using your usual engineering processes.
Features
-
Can be called multiple times on the same run - allows for easy parallel testing of different changes.
-
Can also be called on Pipeline runs that are still in-progress - As long as a Pipeline contained syntactically correct Groovy and able to start, it can be Replayed.
-
Referenced Shared Library code is also modifiable - If a Pipeline run references a Shared Library, the code from the shared library will also be shown and modifiable as part of the Replay page.
Limitations
-
Pipeline runs with syntax errors cannot be replayed - meaning their code cannot be viewed and any changes made in them cannot be retrieved. When using Replay for more significant modifications, save your changes to a file or editor outside of Jenkins before running them. See JENKINS-37589
-
Replayed Pipeline behavior may differ from runs started by other methods - For Pipelines that are not part of a Multi-branch Pipeline, the commit information may differ for the original run and the Replayed run. See JENKINS-36453